Open Appearance → Menus
Log in to your WordPress dashboard. In the left-hand menu, hover over Appearance and click Menus. This is the screen where you build and arrange your site's navigation links.

Find the Pages box
On the right you'll see your Menu structure — every link currently showing on your site, in order. On the left is the Pages box, listing the pages you can add. Use the Most Recent, View All or Search tabs to find the page you want.
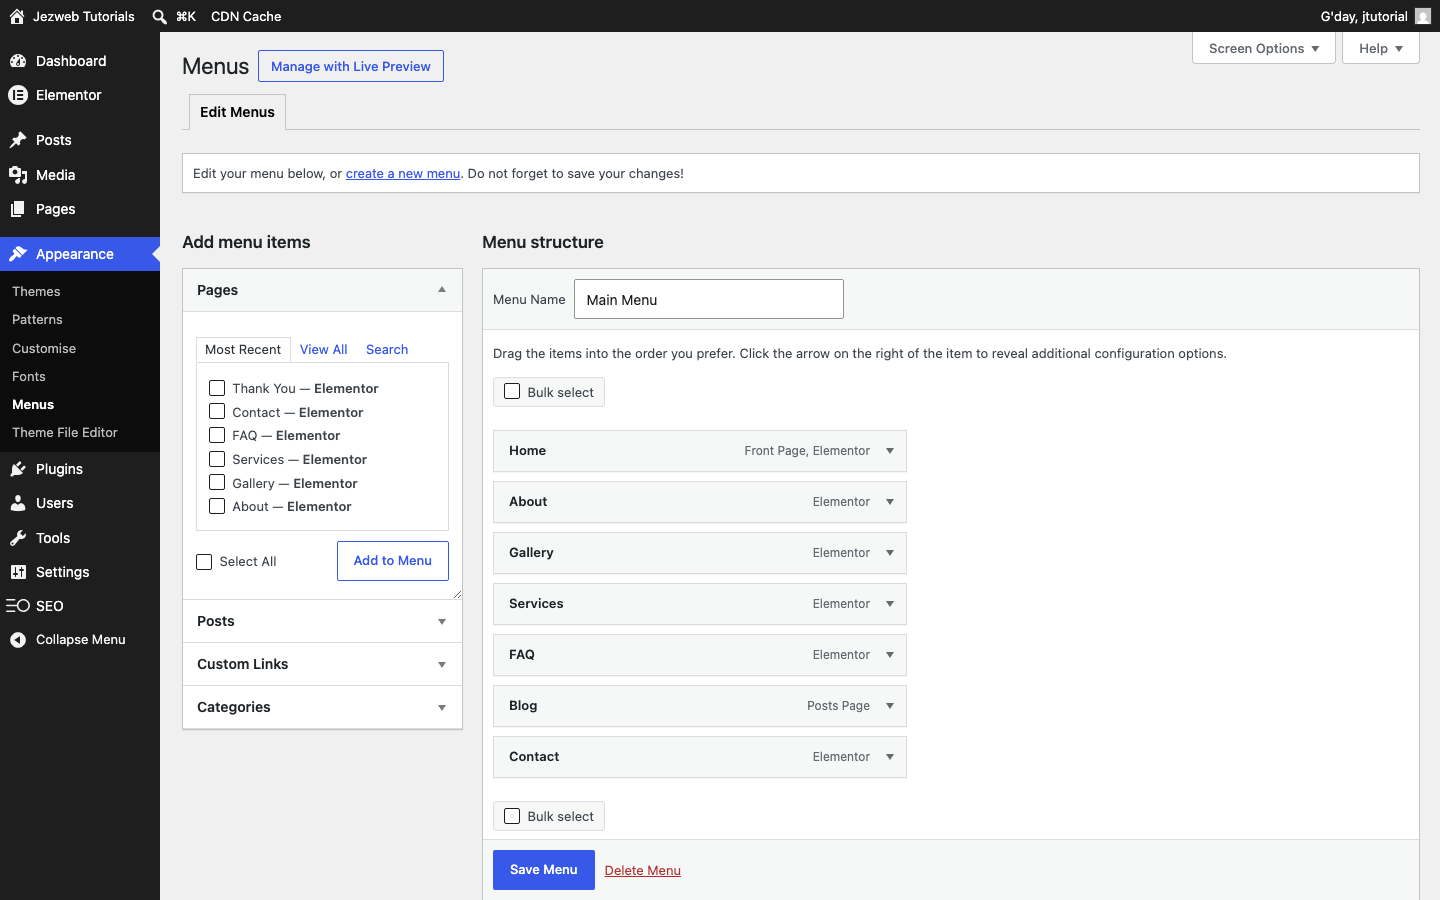
Tick the page and click Add to Menu
Tick the checkbox next to the page you'd like to add — we'll use the Thank You page — then click Add to Menu. The page drops into the menu structure on the right.
Drag to reorder (and indent for sub-items)
Your new link lands at the bottom of the structure. Click and drag it up or down to set its position in the menu.
Tip: drag a menu item slightly to the right and it tucks underneath the item above it as a drop-down sub-item — a neat way to group related pages, like putting several service pages under a single Services link.

Save your menu
When everything's in the right place, click the Save Menu button. Your changes go live straight away and visitors will see the new link in your navigation.
